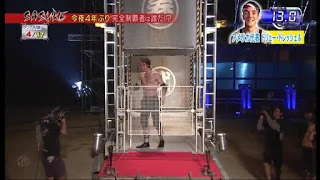
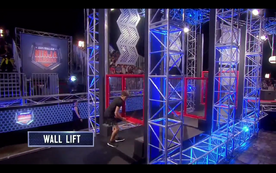
Wall Lifting (ウォールリフティング), called Wall Lift on English broadcasts, has been the final obstacle of Second Stage since the first tournament, only not used on three tournaments, being SASUKE 18 (replaced by Shoulder Walk), SASUKE 28, and SASUKE 29 (both replaced by Passing Wall), marking it the obstacle with most appearance in SASUKE. It also become the only obstacle which use English alphabet for its naming, as it was called Wall Lifting (WALL LIFTING) and Wall Lifting Run (WALL LIFTING RUN) in the first two tournaments, before being changed to Katakana naming, which still stands today.
Its function is simple: competitors must lift three walls of increasing weight (which are 2.4 metres apart) and make it to the finish line (pressing a red button since SASUKE 8) before the time runs out. The weight of the three walls are 30 kg (66 lbs), 40 kg (88 lbs), and 50 kg (110 lbs), respectively. However, the heavy weights combined with competitors rushing to finish the stage usually lead to time outs.
Development
For the first seven tournaments, competitors just needed to walk through the open gates in order to clear Second Stage. If the competitors fail to do so, the gates will close, signifying a failure.
However, starting SASUKE 8, a button was added, requiring competitors to press it in order to stop the clock, open the gates, and move on. If competitors went through the gates without pressing the button, they would be disqualified (as Paul Hamm did in SASUKE 14).


Levi Meeuwenberg's foot was trapped by Wall Lifting in SASUKE 20
After Levi Meeuwenberg injured his foot in SASUKE 20, the walls were raised approximately 50 centimetres off the ground, whereas in prior tournaments, the walls were raised in variable heights off the ground. This made the obstacle slightly easier, as competitors could reach under the walls instead of lifting them from the sides. The walls would eventually be lowered to their pre-SASUKE 20 height variables in SASUKE 32.
For SASUKE 28 and SASUKE 29, it was changed into the Passing Wall, a modification of the obstacle, where the second wall had to be pushed apart in order to clear instead of being lifted up.
From SASUKE 30 onwards, due to it being attempted after Backstream, it caused problems for competitors as they had to raise the walls with wet hands, make it slippery.


The second and third walls failed to drop down after Ōmori Akira's run in SASUKE 3

The third wall failed to drop down after Drew Drechsel's run in SASUKE 31
In some instances, due to high humidity, the walls would not go down when the competitors lifted them. This happened on two occasions, in SASUKE 3 (during Ōmori Akira's run, where wall #2 and #3 were stuck midway) and in SASUKE 31 (during Drew Drechsel's run, where wall #3 was stuck all the way up). This, combining with trying to prevent injury occured to Levi Meeuwenberg from happening again, prompting the producers to install a mechanism starting from SASUKE 32 that would allow the walls that used to drop down suddenly after no more upwards pressure applied to now drop slowly, albeit this make things easier for competitors as they could had more time to dive below the walls.
Visual Designs
- For the first 12 SASUKE tournaments, the walls ware painted with black and yellow stripes, with the numbers "1", "2", and "3".
- From SASUKE 13 to SASUKE 17, the walls were repainted with black and silver stripes, with the Roman numerals "I", "II", and "III".
- From SASUKE 19 to SASUKE 27, the numbers and stripes were removed and replaced with plain wooden walls.
- From SASUKE 30 to SASUKE 34, the walls were changed back to metal and painted silver with the currently used Japanese daiji numerals (Accounting numbers) "壱", "弐", and "参", though that was firstly used on Passing Wall.
- In SASUKE 35, the walls were still silver, but had a yellow outline and the daiji numerals were replaced with the numbering system used during the first 12 SASUKE tournaments, albeit the numbers were relocated to the lower right corner of the walls as opposed to the center in the previous designs. Black outline was added on the design of the walls in SASUKE 36.
")
")
")
")
")
")
KUNOICHI Appearance
Wall Lifting appeared in KUNOICHI 10 as the fifth and final obstacle of the BLUE Stage (Second Stage). The weight of the walls were toned down to 10 kg (22 lbs), 15 kg (33 lbs), and 20 kg (44 lbs), respectively, in order to make the obstacle easier for women. In addition, screen walls were added on the top of the walls to prevent competitors from skipping the walls.
Coincidentally, its first appearance has the same completion rate as its first appearance in SASUKE, as three out of four competitors completed the obstacle in KUNOICHI 10, for a 75% completion rate. While in SASUKE 1, six out of eight competitors completed the obstacle, also a 75% completion rate.
Competitors' Success Rate
- All results based on the TBS broadcast and external information found.
SASUKE
| SASUKE | Clears | Attempts | Percentage |
|---|---|---|---|
| 1 | 6 | 8 | 75% |
| 2 | 9 | 14 | 64.29% |
| 3 | 6 | 8 | 75% |
| 4 | 11 | 12 | 91.67% |
| 5 | 1 | 1 | 100% |
| 6 | 5 | 5 | 100% |
| 7 | 5 | 5 | 100% |
| 8 | 4 | 5 | 80% |
| 9 | 4 | 6 | 66.67% |
| 10 | 4 | 4 | 100% |
| 11 | 7 | 9 | 77.78% |
| 12 | 10 | 10 | 100% |
| 13 | 5 | 8 | 62.5% |
| 14 | 10 | 12 | 83.33% |
| 15 | 6 | 6 | 100% |
| 16 | 8 | 8 | 100% |
| 17 | 8 | 8 | 100% |
| 19 | 0 | 0 | N/A |
| 20 | 1 | 1 | 100% |
| 21 | 3 | 4 | 75% |
| 22 | 4 | 4 | 100% |
| 23 | 7 | 7 | 100% |
| 24 | 7 | 7 | 100% |
| 25 | 5 | 5 | 100% |
| 26 | 6 | 6 | 100% |
| 27 | 10 | 10 | 100% |
| 30 | 9 | 13 | 69.23% |
| 31 | 8 | 10 | 80% |
| 32 | 8 | 8 | 100% |
| 33 | 5 | 5 | 100% |
| 34 | 9 | 10 | 90% |
| 35 | 5 | 6 | 83.33% |
| 36 | 10 | 11 | 90.91% |
| 37 | 8 | 8 | 100% |
| 38 | 5 | 8 | 62.5% |
| Total | 219 | 252 | 86.91% |
KUNOICHI
| KUNOICHI | Clears | Attempts | Percentage |
|---|---|---|---|
| 10 | 3 | 4 | 75% |
| 11 | 4 | 7 | 57.14% |
| Total | 7 | 11 | 63.64% |
Other Appearances
American Ninja Warrior

.jpg)
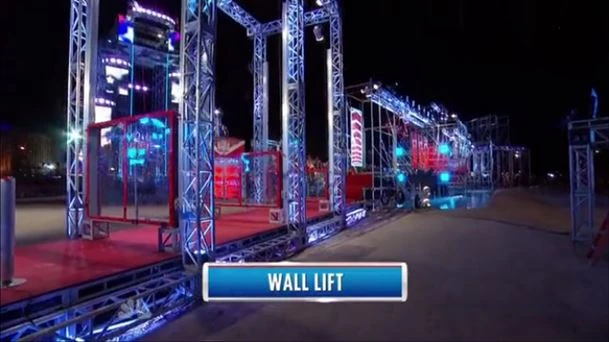
American Ninja Warrior 4's Wall Lift in Northeast and Southeast regions
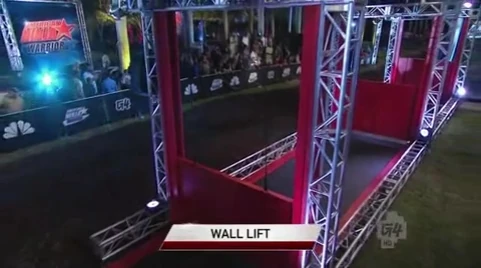
On American Ninja Warrior 4, the Wall Lifting (simply called the Wall Lift) appeared as the sixth obstacle in Northeast and Southeast regions (because of that, the number of obstacles during Northeast and Southeast region qualifiers and finals was seven and ten respectively, rather than six and nine in the other four regions), with the walls weighing less than SASUKE's Second Stage version (45 lbs, 55 lbs, and 65 lbs, i.e. roughly 20kg, 25kg, and 30kg). Since the region qualifiers and finals didn't have a time limit to complete the course, the obstacle served as both time and energy wasters for the competitors.

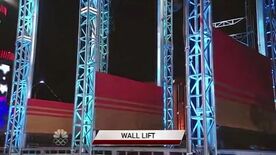
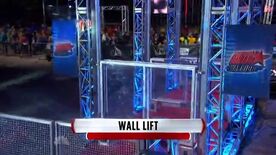
American Ninja Warrior 4's Wall Lift in Stage Two

American Ninja Warrior 5's Wall Lift in Stage Two

American Ninja Warrior 6's Wall Lift in Stage Two
American Ninja Warrior 7's Wall Lift in Stage Two
Furthermore, the Wall Lift appeared as the sixth and final obstacle in Stage Two from American Ninja Warrior 4 to American Ninja Warrior 7, with the walls weighing the same as their SASUKE version, albeit with an alternate counterweight-based system and the walls being raised, to prevent what happened to Levi Meeuwenberg in SASUKE 20 from happening again.
On American Ninja Warrior 8, due to the zero knockout rate, the obstacle was replaced with the Wall Flip.
Ninja Warrior UK

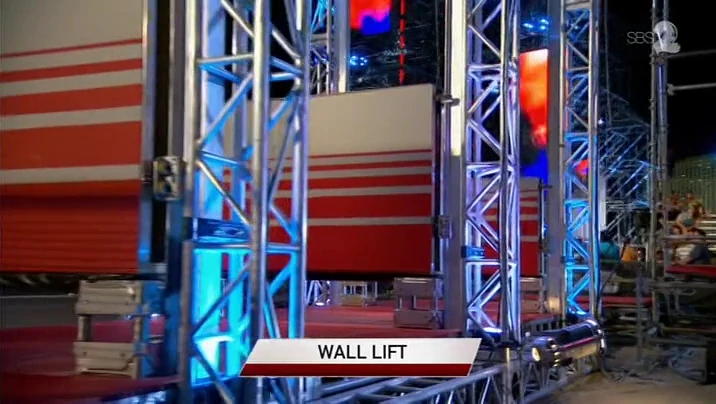
Ninja Warrior UK 4's Wall Lift
The Wall Lift appeared as the fifth obstacle in the finals' Stage 2 from Ninja Warrior UK until Ninja Warrior UK 5. On Ninja Warrior UK, only Timothy Shieff was able to reach the obstacle, but his time ran out while lifting the third wall. On Ninja Warrior UK 2, the obstacle was unattempted. On Ninja Warrior UK 3, the obstacle was finally completed by Cain Clarke and Jonny Urszuly, with both of them becoming the first two competitors to advance to Stage 3.
From Ninja Warrior UK 3 to Ninja Warrior UK 5, the walls were made of Plexiglas (similar to the Wall Lift on American Ninja Warrior 7).
Australian Ninja Warrior

Australian Ninja Warrior's Wall Lift
A same version of the Wall Lift from American Ninja Warrior 7 appeared:
- as the fifth and final obstacle of timed portion in Stage Two on Australian Ninja Warrior,
- as the eighth and final obstacle in Stage Two on Australian Ninja Warrior 2, and
- as the sixth and final obstacle in Stage Two on Australian Ninja Warrior 3 and Australian Ninja Warrior 4 (with the first, second, and third walls being toned down to 20, 30, and 40 kg respectively).
During the first two seasons, the obstacle was unattempted. On Australian Ninja Warrior 3, five competitors were able to reach and complete the obstacle within the time limit and advance to Stage Three.
Competitors' Success Rate
- All results based on the NBC broadcast and external information found.
American Ninja Warrior
| ANW | Clears | Attempts | Percentage |
|---|---|---|---|
| ANW4 | 1 | 1 | 100% |
| ANW5 | 7 | 7 | 100% |
| ANW6 | 2 | 2 | 100% |
| ANW7 | 8 | 8 | 100% |
| USA vs. Japan | 2 | 2 | 100% |
| USA vs. The World | 4 | 4 | 100% |
| USA vs. The World 2 | 3 | 3 | 100% |
| Total | 27 | 27 | 100% |
Visual Design's Developement
KUNOICHI
- For the Wall Lifting used in KUNOICHI, the obstacle featured transparent walls with blue and yellow borders, and had increasing amounts of foam ball within them as the weight, along with the numerical scheme used in the Wall Lifting's pre-SASUKE 13 color scheme.
American Ninja Warrior
- During American Ninja Warrior 4's Northeast and Southeast region qualifiers and finals, the walls were painted plain red.
- On American Ninja Warrior 4 and American Ninja Warrior 5, the walls were colored with red and white stripes.
- On American Ninja Warrior 6 and American Ninja Warrior 7, the walls were changed with transparent walls, made entirely from Plexiglas.
Ninja Warrior UK
- On the first two seasons of Ninja Warrior UK, the walls were colored with black and white stripes.
- From Ninja Warrior UK 3 to Ninja Warrior UK 5, the walls were made of Plexiglas (similar to the Wall Lift on American Ninja Warrior 7).
Australian Ninja Warrior
- From Australian Ninja Warrior to Australian Ninja Warrior 3, the walls were made of Plexiglas (similar to the Wall Lift on American Ninja Warrior 7).
| ||||||||||||||||||||
| |||||||||||||||||||||||||||||