(Undo revision 9781 by Iamsofakingcool (talk)) |
No edit summary Tag: Visual edit |
||
| (22 intermediate revisions by 10 users not shown) | |||
| Line 1: | Line 1: | ||
{{Infobox Obstacle |
{{Infobox Obstacle |
||
| − | |name = |
+ | |name = Gilding Ring |
| − | |image = |
+ | |image = Gliding_ring.jpg |
| − | |caption = Gliding Ring, [[SASUKE |
+ | |caption =[[Nagano Makoto]] attempted the Gliding Ring, [[SASUKE 23]] |
| − | |g4_name = Final Ring |
||
|s_stage = [[Third Stage]] |
|s_stage = [[Third Stage]] |
||
|s_first = [[SASUKE 18]] |
|s_first = [[SASUKE 18]] |
||
| Line 11: | Line 10: | ||
|s_clear = [[SASUKE 22]], [[Urushihara Yuuji]] |
|s_clear = [[SASUKE 22]], [[Urushihara Yuuji]] |
||
}} |
}} |
||
| + | The '''Gliding Ring''' (グライディングリング) is a Third Stage obstacle that replaced the [[Pipe Slider]] in the [[SASUKE 18]] course redesign. |
||
| − | + | Its appearance is similar to the [[Circle Slider]], a First Stage obstacle from [[SASUKE 17]]. However, the track is shorter and the ring is smaller. Its function is similar to the Pipe Slider, where competitors need to push the ring to the end position and swing off the ring over a fairly large gap onto the finishing platform to reach the [[Final Stage]]. |
|
| + | The ring is held in place by a stopper at the beginning to keep it from sliding down the track prematurely. There is only one track holding the ring, and the ring's final position also seems to be at the same height as the gap, making the jump needed for success quite difficult. The distance from the ring to the platform is unknown. |
||
| − | Due to the difficulty of previous third stage obstacles, the Gliding Ring was not attempted in [[SASUKE 18]], [[SASUKE 19|19]], or [[SASUKE 20|20]]. In the [[SASUKE 21|21st Competition]], this obstacle was named the Gliding Ring but an error in design required [[Nagano Makoto]], the only competitor to attempt the obstacle, to force the ring down the track. This error was fixed in [[SASUKE 22]] and [[Urushihara Yuuji]] easily glided down along the track and became the first to clear it. The goal mat was placed further from the ring as a result, ensnaring [[Takahashi Kenji]] in [[SASUKE 23]]. However, both Nagano Makoto and [[Kanno Hitoshi]] cleared it. In [[SASUKE 24]] six contestants attempt this obstacle. Of the six that attempted it in [[SASUKE 24]], the first, [[Tajima Naoya]], lost his grip when he failed to move the ring past the stopper prior to trying to start the ring down the track. |
||
| ⚫ | |||
| + | Due to the difficulty of previous Third Stage obstacles, the obstacle was not attempted in [[SASUKE 18]], [[SASUKE 19]], and [[SASUKE 20]]. |
||
| + | |||
| + | In [[SASUKE 21]], this obstacle was named the Gliding Ring, but an error in design required [[Nagano Makoto]], the only competitor to attempt the obstacle, to force the ring down the track. This error was fixed in [[SASUKE 22]] and [[Urushihara Yuuji]] easily glided down along the track and became the first to clear it. To compensate for this, the distance between the ring and the platform was increased. |
||
| + | |||
| + | This obstacle ensnared [[Takahashi Kenji]] in [[SASUKE 23]], when he failed to jump to the landing platform. However, both Nagano Makoto and [[Kanno Hitoshi]] cleared it. In [[SASUKE 24]] six competitors attempt this obstacle. Of the six that attempted it in [[SASUKE 24]], the first, [[Tajima Naoya]], lost his grip when he failed to move the ring past the stopper prior to trying to start the ring down the track, while everyone after him who reached the obstacle cleared it. Ultimately, while the obstacle was designed to replace the Pipe Slider, it ultimately did not prove to be a very difficult obstacle and was taken out of the Third Stage after [[Urushihara Yuuji|Urushihara Yuuji's]] [[Kanzenseiha|kanzenseiha]] and replaced with the [[Flying Bar]]. |
||
| + | |||
| ⚫ | |||
==Final Ring== |
==Final Ring== |
||
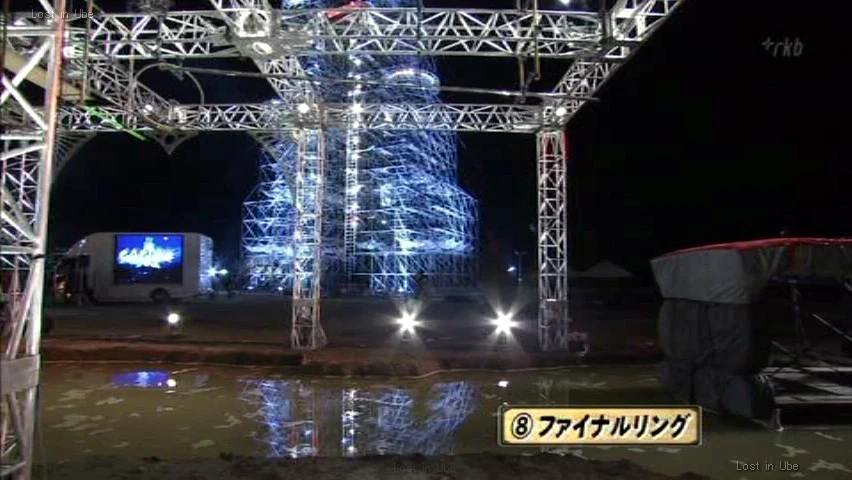
| + | [[File:SASUKE2008_3rdStage-8-FinalRing.jpg|thumb|276px|Final Ring, [[SASUKE 20]]]] |
||
| − | [[File:SASUKE2008_3rdStage-8-FinalRing.jpg|thumb|300px|Final Ring, [[SASUKE 20]]]]In SASUKE 18 - SASUKE 20, the final obstacle in the Third Stage was named the ''Final Ring'' (ファイナルリング). Aesthetically, it looks identical to the Gliding Ring. It is unknown if anything was changed to warrant the name change in SASUKE 21, except for the stopper. In [[SASUKE 23]] and [[SASUKE 24]], G4 used the name again. |
||
| + | From SASUKE 18 to SASUKE 20, the final obstacle in the Third Stage was named as the ''Final Ring'' (ファイナルリング). |
||
| + | Aesthetically, it looks identical to the Gliding Ring. Interestingly, as [[Nagano Makoto|Nagano Makoto's]] grip failed just as he managed to put the ring into the stopper, the announcer [[Hatsuta Keisuke]] called out, "Nagano Final Ringo!", implying that the error in design that required the ring to be forced down the track may in fact have been the design for the Final Ring. |
||
| + | |||
| + | Other than that however, it is unknown if anything was changed to warrant the name change in SASUKE 21, except for the stopper. Regardless of whatever modifications the obstacle went through, in [[SASUKE 23]] and [[SASUKE 24]], G4 used the name ''Final Ring'' once again. |
||
| + | |||
| ⚫ | |||
==Competitors' Success Rate== |
==Competitors' Success Rate== |
||
*All results based on the TBS broadcast and external information found |
*All results based on the TBS broadcast and external information found |
||
| ⚫ | |||
| ⚫ | |||
| ⚫ | |||
| ⚫ | |||
| − | !width="20%" style="background-color: # |
+ | ! width="20%" style="background-color: #4D0503;" |Clears |
| − | !width=" |
+ | ! width="30%" style="background-color: #4D0503;" |Attempts |
| − | !width="30%" style="background-color: # |
+ | ! width="30%" style="background-color: #4D0503;" |Percentage |
| ⚫ | |||
|- |
|- |
||
| − | + | |[[SASUKE 18|18]] |
|
| + | |0 |
||
| − | |align="center" style="background-color: #EEEEEE;"|0 |
||
| + | |0 |
||
| − | |align="center" style="background-color: #EEEEEE;"|0 |
||
| + | |N/A |
||
| − | |align="center" style="background-color: #EEEEEE;"|N/A |
||
|- |
|- |
||
| − | + | |[[SASUKE 19|19]] |
|
| + | |0 |
||
| − | |align="center" style="background-color: #DDDDDD;"|0 |
||
| + | |0 |
||
| − | |align="center" style="background-color: #DDDDDD;"|0 |
||
| + | |N/A |
||
| − | |align="center" style="background-color: #DDDDDD;"|N/A |
||
|- |
|- |
||
| − | + | |[[SASUKE 20|20]] |
|
| + | |0 |
||
| − | |align="center" style="background-color: #EEEEEE;"|0 |
||
| + | |0 |
||
| − | |align="center" style="background-color: #EEEEEE;"|0 |
||
| + | |N/A |
||
| − | |align="center" style="background-color: #EEEEEE;"|N/A |
||
|- |
|- |
||
| − | + | |[[SASUKE 21|21]] |
|
| + | |0 |
||
| − | |align="center" style="background-color: #DDDDDD;"|0 |
||
| + | |1 |
||
| − | |align="center" style="background-color: #DDDDDD;"|1 |
||
| + | |0% |
||
| − | |align="center" style="background-color: #DDDDDD;"|0% |
||
|- |
|- |
||
| − | + | |[[SASUKE 22|22]] |
|
| + | |1 |
||
| − | |align="center" style="background-color: #EEEEEE;"|1 |
||
| + | |1 |
||
| − | |align="center" style="background-color: #EEEEEE;"|1 |
||
| + | |100% |
||
| − | |align="center" style="background-color: #EEEEEE;"|100% |
||
|- |
|- |
||
| − | + | |[[SASUKE 23|23]] |
|
| + | |2 |
||
| − | |align="center" style="background-color: #DDDDDD;"|2 |
||
| + | |3 |
||
| − | |align="center" style="background-color: #DDDDDD;"|3 |
||
| + | |66.67% |
||
| − | |align="center" style="background-color: #DDDDDD;"|66.67% |
||
|- |
|- |
||
| − | + | |[[SASUKE 24|24]] |
|
| + | |5 |
||
| − | |align="center" style="background-color: #EEEEEE;"|5 |
||
| + | |6 |
||
| − | |align="center" style="background-color: #EEEEEE;"|6 |
||
| + | |83.33% |
||
| − | |align="center" style="background-color: #EEEEEE;"|86.67% |
||
|- |
|- |
||
| + | |Total |
||
| − | |align="center" style="background-color: #DDDDDD;"|Total |
||
| + | |8 |
||
| − | |align="center" style="background-color: #DDDDDD;"|8 |
||
| + | |11 |
||
| − | |align="center" style="background-color: #DDDDDD;"|11 |
||
| + | |72.73% |
||
| − | |align="center" style="background-color: #DDDDDD;"|72.73% |
||
|} |
|} |
||
[[Category:SASUKE obstacles]] |
[[Category:SASUKE obstacles]] |
||
| + | [[Category:Kanzenseiha Eliminators]] |
||
Revision as of 12:43, 5 February 2020
The Gliding Ring (グライディングリング) is a Third Stage obstacle that replaced the Pipe Slider in the SASUKE 18 course redesign.
Its appearance is similar to the Circle Slider, a First Stage obstacle from SASUKE 17. However, the track is shorter and the ring is smaller. Its function is similar to the Pipe Slider, where competitors need to push the ring to the end position and swing off the ring over a fairly large gap onto the finishing platform to reach the Final Stage.
The ring is held in place by a stopper at the beginning to keep it from sliding down the track prematurely. There is only one track holding the ring, and the ring's final position also seems to be at the same height as the gap, making the jump needed for success quite difficult. The distance from the ring to the platform is unknown.
Due to the difficulty of previous Third Stage obstacles, the obstacle was not attempted in SASUKE 18, SASUKE 19, and SASUKE 20.
In SASUKE 21, this obstacle was named the Gliding Ring, but an error in design required Nagano Makoto, the only competitor to attempt the obstacle, to force the ring down the track. This error was fixed in SASUKE 22 and Urushihara Yuuji easily glided down along the track and became the first to clear it. To compensate for this, the distance between the ring and the platform was increased.
This obstacle ensnared Takahashi Kenji in SASUKE 23, when he failed to jump to the landing platform. However, both Nagano Makoto and Kanno Hitoshi cleared it. In SASUKE 24 six competitors attempt this obstacle. Of the six that attempted it in SASUKE 24, the first, Tajima Naoya, lost his grip when he failed to move the ring past the stopper prior to trying to start the ring down the track, while everyone after him who reached the obstacle cleared it. Ultimately, while the obstacle was designed to replace the Pipe Slider, it ultimately did not prove to be a very difficult obstacle and was taken out of the Third Stage after Urushihara Yuuji's kanzenseiha and replaced with the Flying Bar.
Final Ring
Final Ring, SASUKE 20
From SASUKE 18 to SASUKE 20, the final obstacle in the Third Stage was named as the Final Ring (ファイナルリング).
Aesthetically, it looks identical to the Gliding Ring. Interestingly, as Nagano Makoto's grip failed just as he managed to put the ring into the stopper, the announcer Hatsuta Keisuke called out, "Nagano Final Ringo!", implying that the error in design that required the ring to be forced down the track may in fact have been the design for the Final Ring.
Other than that however, it is unknown if anything was changed to warrant the name change in SASUKE 21, except for the stopper. Regardless of whatever modifications the obstacle went through, in SASUKE 23 and SASUKE 24, G4 used the name Final Ring once again.
Competitors' Success Rate
- All results based on the TBS broadcast and external information found
| SASUKE | Clears | Attempts | Percentage |
|---|---|---|---|
| 18 | 0 | 0 | N/A |
| 19 | 0 | 0 | N/A |
| 20 | 0 | 0 | N/A |
| 21 | 0 | 1 | 0% |
| 22 | 1 | 1 | 100% |
| 23 | 2 | 3 | 66.67% |
| 24 | 5 | 6 | 83.33% |
| Total | 8 | 11 | 72.73% |